Sciatica pain is sharp, burning, and constant. It travels from your lower back, through your hip, and down your leg. Sitting, standing, or even sleeping becomes uncomfortable.
Most individuals reach for painkillers or rest, but the relief is short-lived. The real problem often lies in tight muscles pressing on the sciatic nerve.
Yoga addresses this at the root. It stretches the hip, lower back, and hamstring muscles that directly affect the sciatic nerve.
This guide walks you through yoga poses for sciatica, with clear step-by-step instructions for each pose.
What Is Sciatica?
The sciatic nerve is the longest nerve in the human body. It starts in the lower back, runs through the buttocks, and extends down each leg.
Sciatica occurs when this nerve gets compressed or irritated anywhere along its path. The pain usually affects one side of the body.
According to the Mayo Clinic, about 40% of people experience sciatica at some point in their lives.
Causes and Symptoms of Sciatica
Understanding what triggers sciatica helps you choose the right yoga poses for relief.
Common Causes:
| Cause | What Happens |
|---|---|
| Herniated disc | A bulging disc presses directly on the sciatic nerve root |
| Piriformis syndrome | A tight piriformis muscle in the buttocks presses on the nerve |
| Spinal stenosis | Narrowing of the spinal canal squeezes the nerve |
| Bone spurs | Extra bone growth near the spine puts pressure on the nerve |
| Spondylolisthesis | A slipped vertebra compresses the nerve root |
| Pregnancy | The growing uterus can press on the sciatic nerve |
Common Symptoms:
| Symptom | What It Feels Like |
|---|---|
| Shooting pain | Pain runs from the lower back through the hip and down the leg |
| Numbness | Parts of the leg or foot lose sensation |
| Tingling | A pins-and-needles feeling runs along the nerve path |
| Muscle weakness | The leg or foot feels weak when walking or standing |
| Worsened pain while sitting | Prolonged sitting increases pressure on the sciatic nerve |
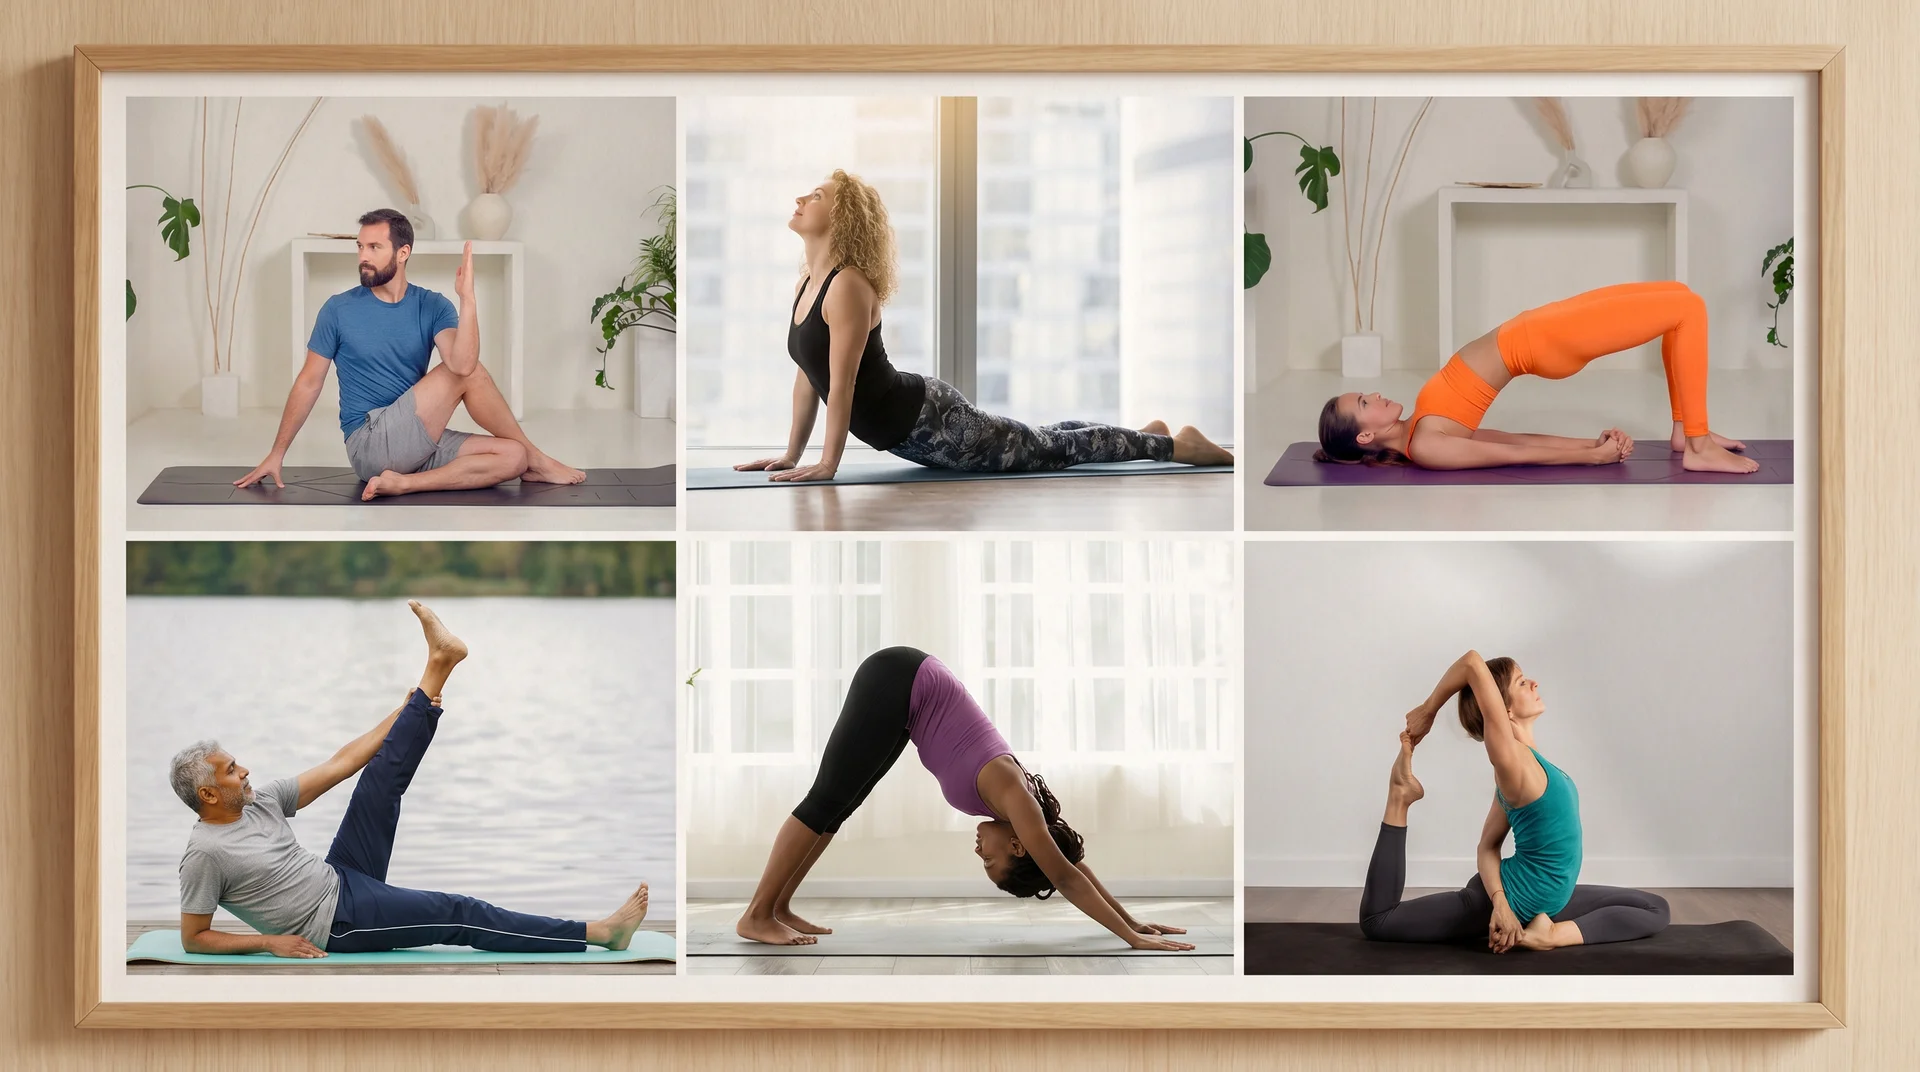
14 Yoga Poses for Sciatica
These yoga poses for sciatica target the muscles that compress the sciatic nerve. Each pose gently releases tension in the lower back, hips, and hamstrings so you can feel real relief over time.
1. Child’s Pose (Balasana)
Video credit: Yoga on Gaia
Child’s Pose is one of the safest and most calming starting points for sciatica relief. It stretches the lower back, hips, and thighs, the areas that tighten most when the sciatic nerve is under stress. Holding this pose regularly helps relieve spinal compression and ease the lower back.
How to Do It:
- Kneel on your mat with your knees hip-width apart and your big toes touching behind you.
- Sit your hips back toward your heels as far as is comfortable.
- Walk your arms forward along the mat and lower your chest toward the floor.
- Rest your forehead on the mat and let your whole body relax.
- Take slow, deep breaths and hold the position for 30 to 60 seconds.
- To come out, press your palms into the mat and slowly sit back upright.
2. Pigeon Pose (Eka Pada Rajakapotasana)
Video credit: YogaEasy
Pigeon Pose directly stretches the piriformis muscle, one of the most common sources of sciatic nerve irritation. The piriformis sits deep in the buttocks and, when tight, can press on the sciatic nerve, causing sharp pain down the leg. Regularly stretching this muscle is one of the most reliable ways to achieve long-term sciatica relief.
How to Do It:
- Begin on all fours in a tabletop position.
- Slide your right knee forward toward your right wrist and angle your shin across the mat.
- Extend your left leg straight back so the top of your left foot rests flat on the mat.
- Square your hips toward the front of the mat and lower them toward the floor.
- Fold your upper body forward over your front leg and rest your forearms on the mat.
- Hold for 30 to 60 seconds, then press back up and switch sides.
3. Eye of the Needle Pose (Supta Kapotasana)
Video credit: Yinfluence
Eye of the Needle is a reclined version of Pigeon Pose, and it is much gentler on the knees and hips. It stretches the piriformis and the outer hip muscles, both of which irritate the sciatic nerve when tight. This pose works well for beginners or anyone who finds Pigeon Pose too intense to start with.
How to Do It:
- Lie on your back with both knees bent and feet flat on the mat.
- Cross your right ankle over your left thigh, just above the knee.
- Flex your right foot firmly to protect the knee joint.
- Interlace your hands behind your left thigh and draw both legs toward your chest.
- Keep your shoulders and head flat on the mat throughout.
- Hold for 30 to 60 seconds, breathing steadily, then switch sides.
4. Knees-to-Chest Pose (Apanasana)
Video credit: Yoga Screen
Knees-to-Chest is a simple yet useful pose that relieves lower back tension associated with sciatica. It gently stretches the lower back muscles and the sacroiliac joint, an area that often gets stiff when the sciatic nerve is irritated. The gentle rocking in this pose provides a light massage to the lower back.
How to Do It:
- Lie flat on your back with your legs extended on the mat.
- Bend both knees and slowly draw them up toward your chest.
- Wrap your arms around your shins and hold firmly.
- Gently rock from side to side for 15 to 20 seconds to release tension along the lower back.
- Then hold still and stay in the position for 30 to 60 seconds.
- Lower your feet slowly back to the mat and release.
5. Reclining Hand-to-Big-Toe Pose (Supta Padangusthasana)
Video credit: Rehab My Patient
Tight hamstrings are a major contributor to sciatica pain, and this pose targets them directly. You stretch the entire back of one leg at a time while lying flat, so there is no strain on the spine. This makes it one of the safest yoga poses for lower back pain and sciatica.
How to Do It:
- Lie on your back with both legs extended flat on the mat.
- Bend your right knee and draw it toward your chest.
- Loop a yoga strap, resistance band, or folded towel around the ball of your right foot.
- Hold the strap in both hands and slowly straighten your right leg toward the ceiling.
- Keep your left leg pressed flat against the mat and your lower back in contact with the floor.
- Hold for 30 to 60 seconds, then lower the leg slowly and switch sides.
6. Seated Forward Bend (Paschimottanasana)
Video credit: intosport
Seated Forward Bend stretches the hamstrings, lower back, and the muscles running along the entire spine at once. When done correctly, it reduces the pulling tension on the pelvis that often makes sciatic nerve pain worse. This pose also calms the nervous system, helping reduce sensitivity around the irritated nerve.
How to Do It:
- Sit on your mat with both legs extended straight in front of you.
- Flex your feet and press actively through your heels.
- Sit tall, take a deep breath in, and feel your spine lengthen upward.
- Exhale and hinge forward from your hips, not your waist, reaching toward your feet.
- Hold your feet, ankles, or shins, wherever your hands naturally reach without straining.
- Hold the stretch for 30 to 60 seconds, breathing the whole time slowly.
7. Cat-Cow Pose (Marjaryasana-Bitilasana)
Video credit: YanvaYoga
Cat-Cow is a moving pose that warms up the spine and releases lower back tightness before deeper stretches. The alternating movement between arching and rounding increases blood flow to the spinal discs. It also helps move blood to the muscles near the sciatic nerve, making all other poses in this routine more productive.
How to Do It:
- Start on all fours with your wrists directly under your shoulders and knees under your hips.
- Keep your spine in a neutral, flat position to begin.
- Inhale, drop your belly toward the mat, lift your chest, and raise your tailbone toward the ceiling (Cow).
- Exhale and round your spine upward toward the ceiling. Tuck your chin to your chest and draw your tailbone under (Cat).
- Continue alternating between the two positions at a slow, steady pace.
- Repeat the full cycle 8 to 10 times, breathing with each movement.
8. Cobra Pose (Bhujangasana)
Video credit: Yoga Journal
Cobra Pose strengthens the lower back muscles and helps create space between the spinal vertebrae. It is often used in physical therapy to help move disc pressure away from the nerve root, making it useful for disc-related sciatica. It also builds lower back strength that supports better posture over time.
How to Do It:
- Lie face down on your mat with your legs extended and the tops of your feet resting on the floor.
- Place your palms flat on the mat directly under your shoulders, fingers pointing forward.
- Press the tops of your feet and your pelvis gently into the mat.
- Inhale and slowly lift your head, chest, and upper abdomen off the floor.
- Keep your elbows slightly bent and your shoulders pulled away from your ears.
- Hold for 15 to 30 seconds, lower down slowly, rest for a breath, and repeat 2 to 3 times.
9. Locust Pose (Salabhasana)
Video credit: Yogaia
Locust Pose builds strength in the lower back, glutes, and core, the three muscle groups that protect the spine and the sciatic nerve. Most people with sciatica have weakness in these areas, and strengthening them reduces the load on the spine. A stronger lower back means less compression on the nerve over time.
How to Do It:
- Lie face down with your arms resting alongside your body and palms facing up.
- Press your pelvis and the tops of your feet firmly into the mat.
- Take a deep breath in. On the exhale, lift your head, chest, arms, and legs off the mat at the same time.
- Keep your legs straight and squeeze your glutes firmly.
- Look slightly forward, not straight up, to keep your neck in line with your spine.
- Hold for 15 to 30 seconds, lower down, rest briefly, and repeat 3 times.
10. Bridge Pose (Setu Bandha Sarvangasana)
Video credit: YogaEasy
Bridge Pose is a gentle backbend that strengthens the glutes, lower back, and abdominal muscles at the same time. These muscles form the support structure around the spine. Building strength helps reduce daily pressure on the sciatic nerve and is safe for most people with sciatica.
How to Do It:
- Lie on your back with your knees bent and feet flat on the mat, hip-width apart.
- Place your arms flat against your body, palms facing down.
- Press your feet firmly into the mat and slowly lift your hips toward the ceiling.
- Squeeze your glutes at the top, then gently press your shoulders into the mat.
- Hold the lifted position for 5 to 10 seconds, then lower your hips back down with control.
- Rest for a breath, then repeat 8 to 10 times.
11. Downward Facing Dog (Adho Mukha Svanasana)
Video credit: Tatler Asia
Downward-Facing Dog lengthens the entire back of the body in one stretch. This includes the hamstrings, calves, and the full length of the spine, all areas that directly influence tension on the sciatic nerve. This pose also creates gentle traction along the spine, opening space between the vertebrae and reducing nerve compression.
How to Do It:
- Begin on all fours with your wrists under your shoulders and knees under your hips.
- Spread your fingers wide and press your palms flat into the mat.
- Tuck your toes under and press your hips up and back toward the ceiling.
- Straighten your legs as much as possible and press your heels toward the floor.
- Let your head hang naturally between your upper arms and look back toward your feet.
- Hold for 30 to 60 seconds, breathing deeply, then lower your knees back to the mat.
12. Half Lord of the Fishes (Ardha Matsyendrasana)
Video credit: Jivasoul
This seated spinal twist rotates the spine and stretches the piriformis on the side of the twist. Spinal twists help relieve the compression that builds up in the lumbar region, where the sciatic nerve roots begin. Done carefully with a tall spine, this pose can bring real relief to sciatic nerve tension.
How to Do It:
- Sit on your mat with both legs extended in front of you.
- Bend your right knee and place your right foot flat on the mat, outside your left thigh.
- Bend your left knee and draw your left foot toward your right hip.
- Sit tall, take a breath in, and on the exhale, gently rotate your torso to the right.
- Place your right hand flat on the mat behind you and press your left upper arm against your right knee.
- Hold for 30 seconds, looking over your right shoulder, then unwind slowly and switch sides.
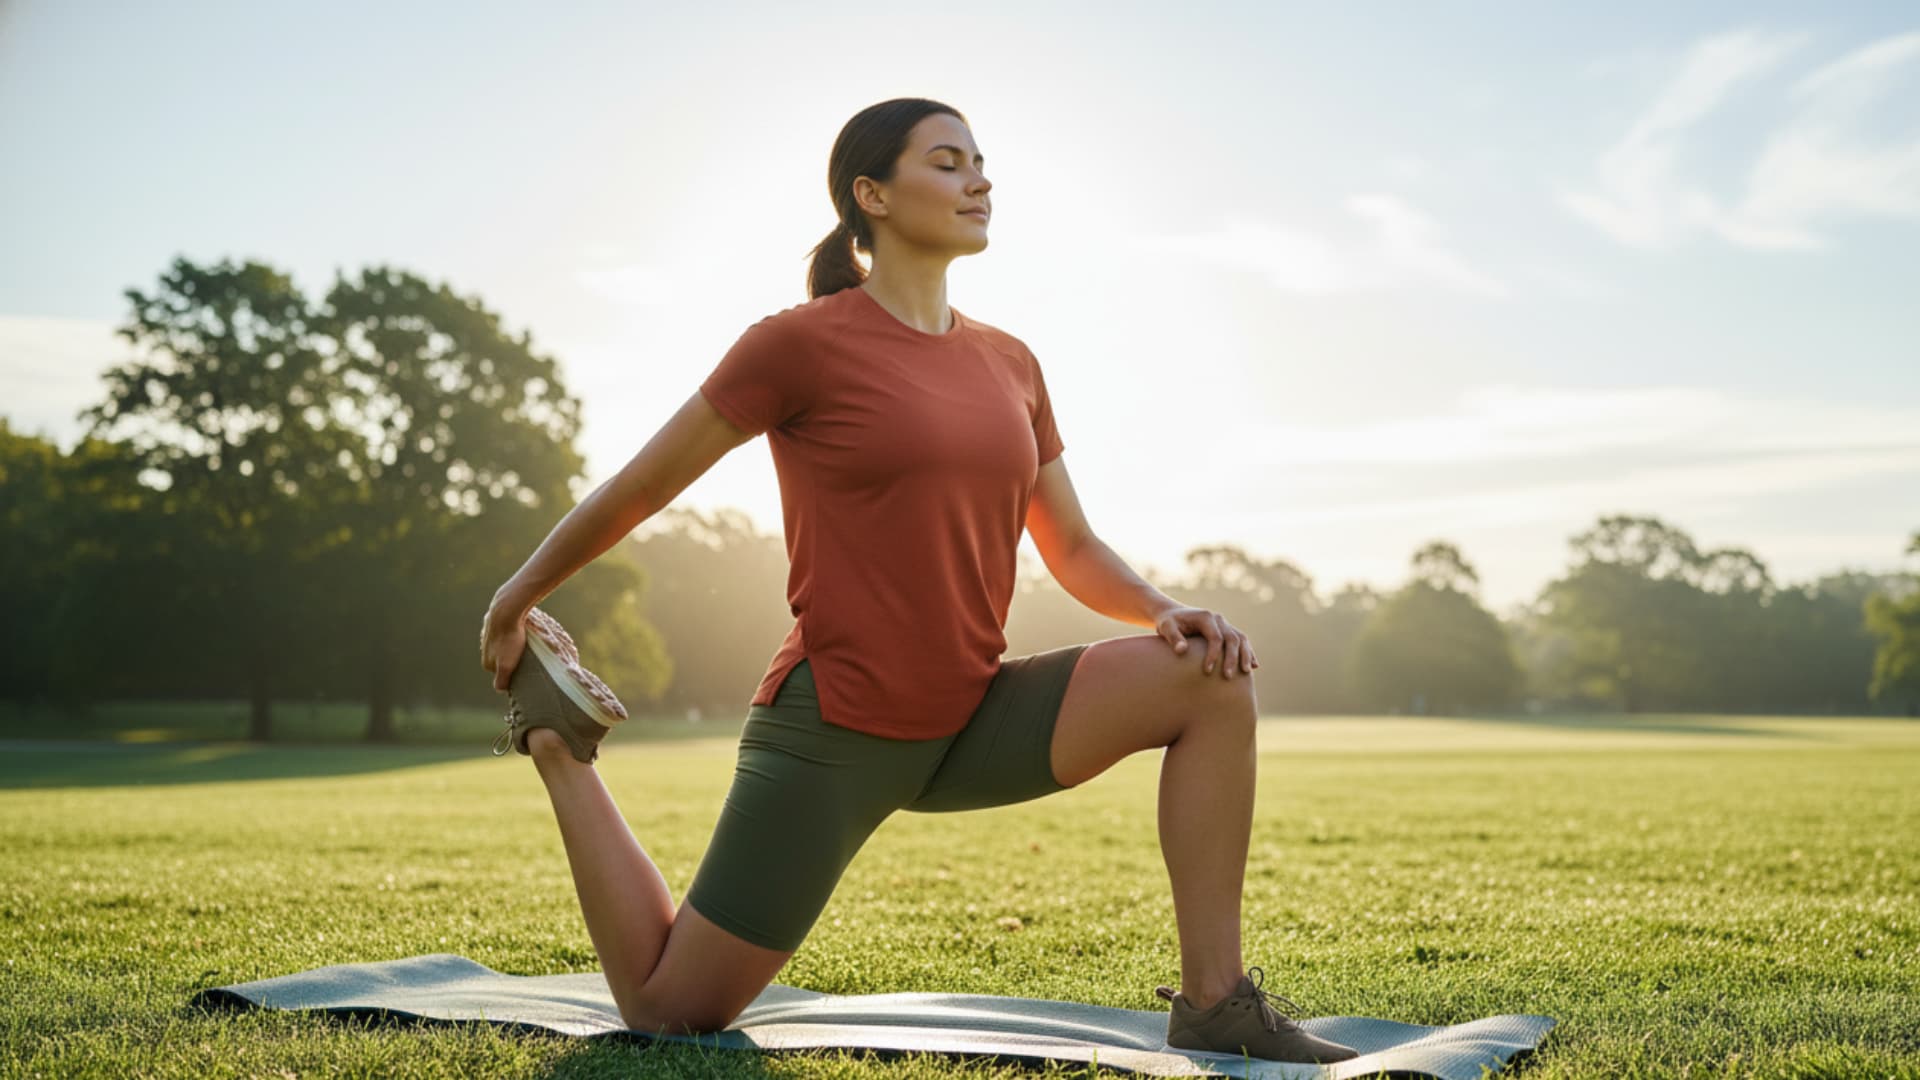
13. Warrior I (Virabhadrasana I)
Video credit: Purple Room Yoga
Warrior I is a standing pose that opens the hip flexors, strengthens the legs, and stabilizes the pelvis. Tight hip flexors pull the pelvis forward and increase pressure on the lower back and sciatic nerve.
Stretching and strengthening these muscles improve the pelvis’s alignment and reduce nerve irritation over time.
How to Do It:
- Stand at the top of your mat with your feet together.
- Step your left foot back about 3 to 4 feet and turn it out at a 45-degree angle.
- Bend your right knee until it sits directly over your right ankle with your shin vertical.
- Press firmly through your back foot and square your hips toward the front of the mat.
- Raise both arms overhead and keep your shoulders relaxed, not raised toward your ears.
- Hold for 30 seconds, then step your feet back together and switch sides.
14. Thread the Needle Pose (Urdhva Mukha Pasasana)
Video credit: Well+Good
Thread the Needle is a floor-based twist that releases tightness in the upper back, shoulders, and hips. The gentle rotation stretches the muscles along the sides of the spine that often tighten in response to sciatic nerve irritation. It is a calming and low-impact pose that works well at the end of a sciatica yoga session.
How to Do It:
- Begin on all fours in a tabletop position with a neutral spine.
- Lift your right arm toward the ceiling and open your chest to the right.
- Slowly slide your right arm under your left arm with your palm facing up.
- Lower your right shoulder and the right side of your head to the mat.
- Keep your hips stacked above your knees and your left arm lightly pressing into the mat for balance.
- Hold for 30 to 60 seconds, breathing slowly, then press back up and switch sides.
These yoga poses for sciatica target the muscles that can compress or irritate the sciatic nerve. Each pose gently stretches the lower back, hips, and hamstrings to help reduce tension and improve mobility.
Many of these movements are also suitable as sciatica exercises for seniors because they are low-impact and can be modified to match different fitness levels.
Yoga for Lower Back Pain and Sciatica
Many people ask: Is yoga good for sciatica? The right approach makes all the difference between getting relief and making the pain worse.
Here is what works best when using yoga for lower back pain and sciatica:
- Target the piriformis first: Pigeon Pose and Eye of the Needle directly stretch this muscle, which is the most common source of sciatica flare-ups.
- Stretch the hamstrings regularly: Tight hamstrings pull on the pelvis, worsening lower back pain. Supta Padangusthasana and Paschimottanasana are your best options here.
- Build glute and core strength: Bridge Pose and Locust Pose strengthen the muscles that support and protect your spine.
- Use spinal twists with control: Ardha Matsyendrasana relieves spine compression, but always keep the motion slow and controlled.
- Warm up before deeper poses: Always start with Cat-Cow or Knees-to-Chest before moving to poses like Pigeon or Downward Dog.
- Keep sessions short and steady: 15 minutes of daily practice yields better results than a single long session per week.
- Avoid forcing any stretch: Pain is a signal to stop. Gentle stretching works far better than pushing through discomfort.
For more on exercise-based treatment for sciatica, visit the American Academy of Orthopedic Surgeons (AAOS). Some people also combine sciatica yoga with Pilates, as Pilates focuses on strengthening the core, glutes, and pelvic muscles that support the spine. Together, these approaches can improve flexibility, stability, and overall movement quality.
When to Stop and See a Doctor
Yoga can help manage sciatica, but it does not replace medical care.
Stop your practice right away if you feel sudden sharp pain that gets worse with each session, experience numbness that spreads quickly, or notice any loss of bladder or bowel control.
Also see a doctor if your pain does not improve after several weeks of regular yoga, or if one leg feels much weaker than the other.
OrthoInfo by AAOS states that about 80% to 90% of sciatica cases improve over time without surgery, though severe or lasting symptoms may need medical evaluation
Final Thoughts
Sciatica pain does not have to be a permanent part of your life. These yoga poses for sciatica offer a practical way to reduce nerve pressure and achieve lasting relief.
Start with the gentler poses and work at your own pace. Consistency matters far more than intensity.
Even 15 minutes a day can make a real difference over time. If your pain gets worse or you notice numbness spreading, stop and see a doctor.
Your body gives you clear signals. Listen to them. Start your yoga practice today and work your way toward a life with less pain.